
| Murlocs, Harpies, and Wolvar, Oh My! | Dragons! | Flock Together | The Lil' Necromancer | Mousing Around |
| Master of Magic | Ragnaros, Watch and Learn | Best of the Beasts |  Aquatic Acquiescence Aquatic Acquiescence | Roboteer |

2
2
|
Average rating: |
3 |
|
Ratings: |
6 |
|
Your vote: |
|
Creator |
||||||||||
|---|---|---|---|---|---|---|---|---|---|---|
|
Tags
Filter strategies:
|
|||||||||
| 1 | 
|
Breed Script |
2 | 5.0 |
6 |
143
2:23
|
19+ | |||
| 2 | 

|

Putting Vert's strategy from the comments up cause it was the only one that worked for me.
Script thanks to Sunshine |
RNG Script |
2 | 4.1 |
12 |
230
3:50
|
30+ | ||
| 3 | 

|
Power restriction has been put in place, thank you to Fanta & Aevintiri for feedbakc on the breeds!
|
Breed Script |
2 | 4.7 |
9 |
145
2:25
|
18 | ||
| 4 | 

|
Little bit of RNG, it works 85% of the time
Script thanks to Aesetha |
RNG Script |
2 | 3.7 |
20 |
154
2:34
|
21 | ||
| 5 | 
|
3rd pet slot MUST have 277 speed or greater.
Sim winrate = 86.2% |
Breed RNG Script |
2 | 5.0 |
4 |
120
2:00
|
15 | ||
| 6 | 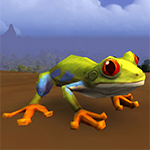
|
Burton
|
RNG |
2 | 3.7 |
1 |
177
2:57
|
22+ | ||
| 7 | 
|
Asarkhadon
|
RNG |
2 | 3.3 |
1 |
158
2:38
|
19+ | ||
| 8 |

|
|
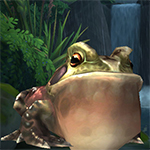
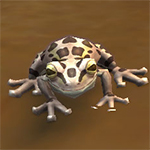
If you can, pick a frog with higher speed than 280. Alternatively one of the Power variants. All other frogs can work as well but it's very risky.
|
RNG |
2 | 3.0 |
2 |
155
2:35
|
19+ |
Incl. steps:


Substitutes:
1 / 4
1 / 2

If you can, pick a frog with higher speed than 280. Alternatively one of the Power variants. All other frogs can work as well but it's very risky.
| Before | After | Experience Gain | |
|---|---|---|---|
| 1 | ➜ | 13 | 5981 |
| 2 | ➜ | 13 | 6353 |
| 3 | ➜ | 14 | 6683 |
| 4 | ➜ | 14 | 6971 |
| 5 | ➜ | 14 | 7219 |
| 6 | ➜ | 15 | 7425 |
| 7 | ➜ | 15 | 7590 |
| 8 | ➜ | 16 | 7714 |
| 9 | ➜ | 16 | 7796 |
| 10 | ➜ | 17 | 7838 |
| 11 | ➜ | 17 | 7838 |
| 12 | ➜ | 18 | 7796 |
| 13 | ➜ | 19 | 7714 |
| 14 | ➜ | 19 | 7590 |
| 15 | ➜ | 20 | 7425 |
| 16 | ➜ | 20 | 7219 |
| 17 | ➜ | 21 | 6971 |
| 18 | ➜ | 22 | 6683 |
| 19 | ➜ | 22 | 6353 |
| 20 | ➜ | 23 | 5981 |
| 21 | ➜ | 23 | 5569 |
| 22 | ➜ | 24 | 5115 |
| 23 | ➜ | 25 | 3900 |
| 24 | ➜ | 25 | 1980 |
|
Safari Hat |
|
|
Lesser Pet Treat |
|
|
Pet Treat |
|
|
Darkmoon Hat |
|
|
Pet Battle Week |
|
= |
Pet levels to 25 with minimal XP lost |
|
|
= |
Additional XP above level 25 is lost |
|
For the best display of your strategy, please follow these guidelines:


For the best display of your strategy, please follow these guidelines:
For the best display of your strategy, please follow these guidelines:
For the best display of your strategy, please follow these guidelines:
For the best display of your strategy, please follow these guidelines:
For the best display of your strategy, please follow these guidelines:
 Tongue Lash until Lil' Spirit Guide is dead
For the best display of your strategy, please follow these guidelines:
For the best display of your strategy, please follow these guidelines:
For the best display of your strategy, please follow these guidelines:
Tongue Lash until your Frog diesFor the best display of your strategy, please follow these guidelines:
For the best display of your strategy, please follow these guidelines:
For the best display of your strategy, please follow these guidelines:
For the best display of your strategy, please follow these guidelines:
Tongue Lash until Quillino is deadFor the best display of your strategy, please follow these guidelines:
For the best display of your strategy, please follow these guidelines:
For the best display of your strategy, please follow these guidelines:
For the best display of your strategy, please follow these guidelines:
Tongue Lash until Mud Jumper diesFor the best display of your strategy, please follow these guidelines:
For the best display of your strategy, please follow these guidelines:
For the best display of your strategy, please follow these guidelines:
For the best display of your strategy, please follow these guidelines:
For the best display of your strategy, please follow these guidelines:
For the best display of your strategy, please follow these guidelines:

We should have cow pets.


 Swarm of Flies
 Healing Wave
 Bubble
 Mudslide
 Lightning Shield
 Jolt
Jolt Paralyzing Shock
4
lenoirrichelieu
wrote on 2018-06-05 16:49:45
Mojo (212): Swarm of Flies-Healing Wave-Tongue Lash until Lil' Spirit Guide is in undead phase. Then I used again Swarm of Flies (to get more rounds for next pet)
Tundra Penguin (121): Slippery Ice - Ice Lance until Quillino is dead
Spawn of G'nathus(222): Lightning Shield-Jolt-Paralyzing Shock-Jolt (if necessary)
0
Neme wrote on 2018-06-05 17:30:12
0
Öz wrote on 2020-11-02 17:59:55
1
Mayami#2460
wrote on 2021-06-09 18:41:54
1
Qatarra
wrote on 2023-05-06 19:12:18
1
Xdb#2623
wrote on 2024-02-10 14:38:47
1
kerrsmith
wrote on 2020-09-29 15:25:39
1
Ajfree#1772
wrote on 2020-08-04 18:09:10
0
beasterstv wrote on 2018-06-05 19:27:13
0
Anonymous wrote on 2018-05-08 17:34:35
9
Vert wrote on 2017-11-08 12:55:56
Magical Crawdad 1/1/2
Spawn of G'nathus 1/2/2
Emperor and Spirit Guide will take out each other
Crawdad will take out Quillino and die from Fethyr lift-off.
Lightning Shield followed by Paralyzing Shock, if Fethyr did 3 thrash hits. Swallow you Whole will kill it.
1
Shiney79 wrote on 2017-11-09 02:03:43
1
Gatekus wrote on 2017-11-16 14:48:34
1
Eos wrote on 2017-12-12 19:49:55
0
Ferrwine wrote on 2018-01-04 02:27:20
1
Shekills wrote on 2018-01-27 01:28:02
2
Zmiester#1293
wrote on 2018-02-10 13:18:50
1
Broadway wrote on 2018-04-14 12:35:40
0
Broadway wrote on 2018-04-14 12:41:28
second pet: if he misses you once you won't die to the 3rd pet liftoff, so reset it
Third Pet: Pray he doesn't lift off. 2 3 1, you get a 2nd 1 ability before liftoff
-3
Broadway wrote on 2018-04-14 13:04:19
Whoever the FUCK SAID THIS CHANGE WAS GOOD
IS STUPID
0
Fuze wrote on 2018-04-16 19:39:30
2
PruShendralar wrote on 2017-07-05 17:39:01
if [enemy(#1).active]
ability(Swarm of Flies) [enemy.round=1]
ability(Healing Wave) [enemy.round=2]
ability(Healing Wave) [enemy.round=6]
ability(Tongue Lash)
endif
if [enemy(#2).active & self(#1).active]
ability(Swarm of Flies) [enemy.round=1]
ability(Tongue Lash)
change(#2)
endif
if [enemy(#2).active & self(#1).dead]
ability(Bubble) [self.round=1]
ability(Mudslide) [self.round=2]
ability(Tongue Lash)
endif
if [enemy(#3).active & self(#2).active]
standby [enemy.round=1]
ability(Mudslide) [enemy.round=2]
ability(Tongue Lash) [self(#2).active]
endif
if [enemy(#3).active & self(#2).dead]
ability(Lightning Shield) [self.round=1]
ability(Jolt) [self.round=2]
ability(Paralyzing Shock) [self.round=3]
ability(Jolt)
endif
1
Meadbh
wrote on 2018-04-16 18:09:06
0
Narothen wrote on 2018-04-14 10:36:16
Anyway, I went with:
Swamp Croaker (2/2/2)
Emperor Crab (2/2/2)
Eternal Strider (2/1/2)
Croaker takes out Spirit, pretty much according to the guide. Emperor Crab should use Whirlpool on CD and Surge, use Healing Wave on CD. If you're lucky your Crab will survive second pet and will be able to Surge->Heal->Whirlpool the bird as well. I finished bird with one Pump but I might have been lucky as well.
0
Broadway wrote on 2018-04-14 12:30:17
1
Anonymous wrote on 2017-06-16 11:50:09
Leopard Tree Frog (212)
Tundra Penguin (221)
Moonshell Crab (111)
First apply Swarm, then Healing Wave, finish with tongue, heal when on CD
On Quillino, apply swarm
Bring in Penguin and use Slippery Ice and then Ice Lance
On Fethyr continue with Penguin until he's dead
Bring in Moonshell Crab and use Shell Shield, Renewing Mists and spam Arcane Slash!
0
Sabiah wrote on 2017-09-08 16:38:23
1
rockysp
wrote on 2018-01-26 13:11:13
-5
Eekwibble wrote on 2017-08-22 23:08:40
This one is the closest I've gotten to reliable so far:
Giraffe Calf 1-2-1 (either breed)
Onyxian Whelpling 2-2-2 ('may' be able to sub Spawn of Onyxia but Whelpling's hp is far higher and it's cutting it fine as it is)
Leveling Pet - lvl15+ (over 636hp, preferably over 848hp to soak a couple of potential crits from Thrash), not Critter (because of Thrash), preferably Flying or Magic with a high hitting single attack (>200)
Turns 1-3. Stampede. If you receive any crits; reset
4. Headbutt. Lil' Spirit Guide dies and resurrects. Sometimes he's stunned, don't worry about it
5. Survival. Lil' Spirit Guide dies again
Quillino comes in
1-3. Stampede. Giraffe Calf dies, usually on turn 2
Bring in Whelpling
1. Scorched Earth
2. Tail Sweep. Quillino sometimes dies here
3. Tail Sweep. If this misses because of Blind; reset
Quillino dies
Fethyr comes in
1-2. Deep Breath
3. Scorched Earth
4. Pass. Whelpling dies leaving Fethyr on ~200hp
Bring in Leveling Pet
1. Use any standard attack to kill Fethyr
All told, it's only 14 or 15 rounds, and it works about 80% of the time (from about 30 attempts I've just had).
0
Cernunnas wrote on 2017-10-28 05:03:10
0
Scrapbookee wrote on 2017-10-28 19:33:21
0
Shantii wrote on 2017-10-15 02:11:57
For the second pet, Mud Jumper just wasn't doing enough damage fast enough to kill Quillino, so I used a Strand Crab (or Emperor Crab): Whirlpool on cooldown, Healing Wave as needed (I believe I used it once after the first Whirlpool and then once more on cooldown) and Snap the rest of the time until Quillino was dead.
I managed to get off one more Whirlpool before Fethyr killed my crab, then I followed the above strat with Spawn of G'nathus and finished Fethyr easily.
0
Daedrynn wrote on 2016-10-11 03:24:07
Swamp Croaker (2-2-2)
Tideskipper (1-2-2)
Moonshell Crab (1-1-1)
- Swarm of flies
- Bubble
- Tongue Lash until Lil' Spirit Guide dies.
- Swarm of flies on the resurrection round of Lil' Spirit Guide. Swamp Croaker dies. (There is a very small chance that he dies before the enemy, if so just restart match.)
- Bring inTideskipper
- Crush until Quillino dies.
- Fethyr comes in.
- Geyser. Tideskipper dies.
- Bring in Moonshell Crab.
- Shell Shield
- Renewing Mist
- Arcane Slash
- Arcane Slash
- Renewing mist
- Shell shield
- Arcane Slash until Fethyr dies.
0
Akascha wrote on 2016-10-24 07:13:03
0
Shadowfax wrote on 2016-10-24 13:25:31
0
Stella wrote on 2016-10-24 16:29:10
0
Gráinne
wrote on 2016-10-24 19:04:55
There is also a chance for Quillino to Blind and Spectral Strike and crit your Tideskipper, but that seems to be the unavoidable RNG with Quillino.
0
Evilry wrote on 2016-10-24 21:37:14
2. Tideskipper dies before Quillino even below 400
3. Game over.
0
Solitha wrote on 2016-10-25 04:23:34
0
Jen wrote on 2016-11-02 00:51:21
0
Friskers wrote on 2017-10-14 22:16:11
1
Canukistani wrote on 2017-07-24 16:10:27
0
Zarria wrote on 2017-10-14 06:50:08
0
Emerald wrote on 2017-10-14 18:05:57
0
Mininet wrote on 2017-07-24 19:23:12
0
skarpethinn wrote on 2017-07-15 09:05:26
0
Evil wrote on 2016-10-24 18:40:51
Benax 2/1/1
Spawn of G'nathus 2/1/1
Swarm -> spam tongue lash untill enemy dies, on his ress round use heal, then soak blind, and u will probably die (if not, refresh swarm, if still not dead, use tongue)
Switch to benax, when blind has 1 round CD use bubble (vey important) otherwise mudslide> tongue lash till 2nd pet dies.
Pass (to soak Lift-Off), if u are still alive -> mudslide> tongue lash, untill frog is dead.
Switch to Spawn of G'nathus
Jolt-> Thunderbolt (if enemy Lift-Off just became available PASS round, he flies up, then you use Dive, then Jolt-> Thunderbolt
Tested this fight several times to make sure it works, as it s VERY RNG :(
0
Gráinne
wrote on 2016-10-24 19:19:57
It does require an addon to count Bredda's cooldowns, and for you to be paying attention to when, exactly, you need to Bubble and Dive.
You could also use another frog with speed > 280 in the first slot. Maybe Mojo or some H/S breeds.
0
Evil wrote on 2016-11-03 15:43:51
0
Ptraci wrote on 2016-11-05 08:12:52
0
Mewness wrote on 2016-11-05 19:24:29
0
Evil wrote on 2016-12-05 22:54:03
0
Susie wrote on 2017-07-14 13:35:49
0
Anonymous wrote on 2017-07-06 02:39:21
0
Aeliel wrote on 2017-06-08 06:43:34
0
Tie wrote on 2017-05-19 16:38:50
0
Saltpollen wrote on 2017-03-18 10:46:11
0
Moondrely wrote on 2017-02-09 02:59:07
Frog- Swarm of Flies, Healing Wave, Tongue Lash, Tongue Lash, (first death of first pet) Swarm of Flies, Tongue Lash
Chuck - Rip, Blood in the Water, Surge till second pet is dead (usually twice). Surge to get first hit on Fethyr. If you don't die from his first Lift Off, Rip and Blood in the water again. Surge till dead.
Pengu - Slippery Ice (keep chill up) Ice Lance until dead.
0
Everlea wrote on 2017-03-07 16:56:59
0
Anonymous wrote on 2017-03-17 12:05:13
0
Condor wrote on 2017-02-08 17:07:17
0
Anonymous wrote on 2017-02-15 22:27:56
0
Pilfer wrote on 2017-03-17 08:03:49
0
Daroyski-The Sha'tar wrote on 2017-02-15 07:35:14
Dunno if it do have any effect...but with Battles I use Safari Hat & Manipulator's Talisman.
At least I succeeded on first try, today.
0
Remte
wrote on 2017-03-05 01:08:14
Manipulator's Talisman is for hunters' pets, warlocks' minions, DKs' ghouls etc.
0
Sneaks wrote on 2017-01-25 19:39:00
0
Kabbie wrote on 2017-01-25 18:44:40
0
Heyle wrote on 2017-01-25 08:07:30
0
Anonymous wrote on 2017-01-25 16:50:45
0
Clin wrote on 2017-01-20 19:20:07
0
Sheen wrote on 2017-01-20 14:19:36
0
Strumpett wrote on 2017-01-15 13:22:50
0
Kalaida wrote on 2016-12-27 05:08:37
Went to Wowhead and found this tactic by Fritaz that worked the first time for me:
Swamp Croaker (2,2,2)
Tideskipper (1,x,2)
Moonshell Crab (1,1,1)
Against Lil' Spirit Guide
1. Swarm of Flies
2. Bubble
3. Tongue Lash until Lil' Spirit Guide dies and resurrects
4. Swarm of Flies, Swamp Croaker dies (if Swamp Croaker dies before this point restart the battle)
Against Quillino
1. Crush until Quillino dies
Against Fethyr
1. Geyser, Tideskipper dies
2. Shell Shield
3. Renewing Mists
4. Arcane Slash
5. Arcane Slash
6. Renewing Mists
7. Shell Shield
8. Arcane Slash until Fethyr dies
0
Oreg wrote on 2016-12-27 07:04:07
0
SomeEUPlayer wrote on 2016-12-27 07:08:35
So I tried two times with Mojo instead of Swamp Croaker but Tideskipper wasn't able to kill Quillino because Spectral Strike hit. So I suppose it could work if you use a fast Frog and also restart when Spectral Strike hits.
Also, Geyser can miss when Tideskipper is still blinded. In that case, you might still be able to win, so it's probably not a good idea to restart.
0
Boon wrote on 2016-12-27 10:46:29
0
Anonymous wrote on 2016-12-30 12:29:46
0
Lysmachia wrote on 2017-01-15 04:35:38
0
dee wrote on 2017-01-15 04:57:58
0
Aevd wrote on 2017-01-09 04:40:01
SS breed (this is actually pretty important, only speed frog!) Leopord Tree Frog (222)
Tideskipper (112)
Moonshell Crab (111)
Vs Spirit Guide:
swarm -> heal -> tongue till dead
Vs Quil:
Swarm -> tongue til frog dies
Swap to Tide -> Crush til quil dead
Vs Fethyr:
Geyser -> Crush til dead
Swap to Crab: Arcane slash til you win!
Finished the battle with my crab almost untouched
0
Chaosti wrote on 2016-12-27 12:28:20
0
Ryuuken wrote on 2016-12-27 20:34:48
0
gent wrote on 2016-12-30 18:14:52
0
Atari wrote on 2016-12-30 23:57:10
0
Kaydicakes wrote on 2017-01-08 23:48:33
0
Carandae wrote on 2017-01-08 07:02:55
0
Faerie wrote on 2016-12-27 11:39:55
0
Asarkhadon wrote on 2016-11-13 07:36:08
Mojo 2-1-2
Tundra Penguin 2-2-1
Young mutant warturtle 2-2-2
The fight went the same until the first pet died, then Mojo casts swarm of flies and dies to Quillino attack. The penguin enters the battle, casts slippery ice then icelances Quillino until it dies. When Fethyr comes in, the penguin has around 50% of his HP and casts surge. If you survive the Lift-Off ability cast slippery ice and die next round. Mutant warturtle starts with tornado punch to proc a stun, rotate it with jab, use smoke bomb for Lift-Off - and you're the winner.
0
Piotr wrote on 2016-11-13 08:36:10
0
Lochalan wrote on 2016-11-13 12:20:02
0
Zuckerguss wrote on 2016-11-13 14:46:44
0
Vinsanity wrote on 2016-11-30 12:48:30
0
Anonymous wrote on 2016-12-01 03:14:37
0
Aranesh
wrote on 2016-12-15 06:08:21
0
Burton wrote on 2016-11-13 22:47:11
Mojo 2/1/2
Puddle Terror 2/1/2
Ghostshell Crab 2/2/1
Mojo strat same as everyone. PT immediately put up Nature's Ward and then Punched the porcupine, then did Dive. Even though it's weak, it dodges the Blind. After that continue punching. This killed the porcupine reliably even when he me twice with that 50% hit chance move.
Then the bird comes and PT eats the Flight, dies. Crab comes in, pop Spirit Spikes so he demolishes himself doing Thrash. Fill with Grasp (I chose this since it was reliable damage), then use Bubble the round before he takes off. Around this time, Spirit Spikes was off cooldown, so I waited for him to pop my bubble and used it again.
0
Roye wrote on 2016-11-30 21:32:34
0
Sweetmana wrote on 2016-12-01 03:18:25
0
Aranesh
wrote on 2016-12-15 06:01:15
0
Kotomin wrote on 2016-11-30 22:09:29
Something's wrong with the final Thunderbolt, for me it wasn't dealing the full 536 damage, but only 268
0
Aranesh
wrote on 2016-12-13 11:55:25
0
Corgi wrote on 2016-11-30 23:16:27
0
gerana wrote on 2016-11-30 20:44:10
0
Anonymous wrote on 2016-11-13 18:10:19
mojo 2-1-2
spawn of g'nathus 2-2-1
tiny blue carp 2-1-2
the carp's attacks are strong against flying and that's what saved me in the end
0
Covers wrote on 2016-11-30 11:29:48
0
chasmine wrote on 2016-09-13 06:31:50
Frog (speed LESS then 280, take the one with strengh) 2-1-2
Mud jumper (if you have several frogs with same abilities, you should choose the one with health) 2-1-1
Ghostshell Crab 2-2-1
Start with frog. 3-2-1-1-1-2-3. Pass, or yuse any skill. Your frog will die on next round. Even if you are lucky, even if Bredda had no crits.. in any case frog will die.
Change to Mud jumper. 2-3 then spam 1 till death of Quillino. If you are lucky you will will in with around 950 hp. The worst variant i got was 692.
Bird comes in. Pass. 2-1. Press any ability - on next round your frog will die
Change to crab. 3-2-1. Then use abilities depending on situation. If you weren't lucky and missed with 1, do not use 3 if there is 1 round cd of feather healing.
Profit
0
Anonymous wrote on 2016-09-12 23:51:25
0
Alex wrote on 2016-09-13 00:04:36
0
Anonymous wrote on 2016-09-13 03:26:35
0
Jeack wrote on 2016-09-13 04:44:12
0
chasmine wrote on 2016-09-13 04:53:18
0
Aranesh
wrote on 2016-09-13 05:19:41
0
Anonymous wrote on 2016-09-13 05:50:03
0
Anonymous wrote on 2016-09-27 04:25:20
0
Anonymous wrote on 2016-09-27 06:58:32
0
Gráinne
wrote on 2016-09-27 19:51:46
0
MuffinManKen wrote on 2016-10-10 03:23:06
The second fight is going to be a horrible RNG toss-up no matter what. Emerald Turtle (as listed above) or Emperor Crab worked well for me.
0
TffnyNelson wrote on 2016-10-11 01:34:15
0
Krypti wrote on 2016-11-13 19:24:27
0
Lith wrote on 2016-11-13 03:19:28
0
Aranesh
wrote on 2016-11-13 03:27:17
0
Anonymous wrote on 2016-11-13 03:30:46
0
Lith wrote on 2016-11-13 03:38:53
0
Lith wrote on 2016-11-13 03:52:21
0
Anonymous wrote on 2016-11-06 08:13:55
0
Tel wrote on 2016-11-05 20:46:04
0
Mokrath wrote on 2016-11-05 20:02:46
Skip unless you have no other family achieves left except aquatic like I did.
0
Carrotboy wrote on 2016-11-02 02:52:21
0
Mel wrote on 2016-11-05 13:04:50
0
Jen wrote on 2016-11-05 19:40:32
0
Jatul wrote on 2016-11-05 14:45:52
Any tanky crab would do preferably a H/H Breed with Snap, Healing Wave, and Shell Shield
and the Puddle Terror with Water Jet Nature's Ward and Sunlight
The tiki mask was handeld much like anyone else would with swarm of flies healing when needed and tongue lash to fill. I used a combination of Shell Shield and healing wave to survive the porcupet and snap to widdle it down
The bird is the hardest part which is what the puddle terror is for i was only able to get it to around 80-70% with the crab so i used natures ward with the puddle terror to take neutral damage from the bird and used sunlight to help keep my health stable. Yes you will be helping the bird with that sunlight but the ammount of healing you do will outweigh it and just spam Water Jet on turns where you will hit him. this took me some doing but the key is to reaply natures ward on turns where he will be lifting off so counting turns is a must!
0
Niixten wrote on 2016-11-05 11:52:02
0
Yog wrote on 2016-11-01 15:56:03
0
Julia wrote on 2016-11-05 09:51:03
0
lamhunka wrote on 2016-10-09 22:16:23
I used frog with 325 speed - in my pet journal it is leopard tree frog
swarm of flies, spam -tongue lash
this frog survived to be able to cast new swarm of flies on Quilino
second pet - gulp froglet - swarm . it killed Quilino,
gulp froglet survived to take Lift off from Fethyr
Tiny blue carp - mana surge, psychic blast .. all done... and carp is still having nice amount of life
this strategie is based on speed of frog, but it works perfectly
0
Lohine wrote on 2016-11-01 19:38:08
0
bachomp wrote on 2016-09-27 19:12:56
I went with
Mojo 1 2 1
Emerald Turtle HH - 1 1 1
ghostshell Crab HS 111
same strat for frog, just get flies and spam tongue, heal early
when you bring in em turtle, get shield up as soon as you can, HB when its avail, spam emerald bite. that should kill second pet
Emerald turtle takes the big damage from final pet, should die. use spirit spikes then spam spirit claws
0
Anonymous wrote on 2016-09-27 23:51:21
0
Melandroso wrote on 2016-09-28 02:42:51
0
Passat wrote on 2016-11-01 08:58:42
0
Emera wrote on 2016-11-01 17:31:56
0
Pampoofy wrote on 2016-10-24 15:21:13
0
Sela wrote on 2016-09-27 06:11:34
0
FlibbitSC wrote on 2016-09-26 23:37:06
0
Anonymous wrote on 2016-09-13 03:57:05
0
Jeack wrote on 2016-09-13 04:44:33
0
Kamira wrote on 2016-09-26 23:04:48
0
Nachocuban wrote on 2016-09-13 05:35:30
0
Romath wrote on 2016-09-13 03:39:19
0
Aranesh
wrote on 2016-09-13 04:05:57
0
Dandelioness wrote on 2016-09-13 03:28:10
0
Qindra wrote on 2016-09-12 19:37:07
0
Anonymous wrote on 2017-07-14 10:58:16
0
Anonymous wrote on 2016-12-27 07:10:03
0
Aranesh
wrote on 2016-12-27 07:58:05
0
атанимуса wrote on 2017-11-16 11:22:38
0
Ист wrote on 2017-10-14 14:31:30
0
Anonymous wrote on 2017-06-19 05:56:02
0
Anonymous wrote on 2017-06-16 18:33:03
- после того, как Малый хранитель душ воскресает, выводим Илистого прыгуна. Им мы юзаем Пузырь как раз под 2 абилку Иглуши.
- Илистым прыгуном юзаем Оползень и атакуем языком до его смерти
- после смерти прыгуна выводим нашу 1 лягуху и ею хилимся, вешаем дебаф, стегаем языком. мне повезло, Иглуша не попадал по мне сильной абилкой
- скоростная лягуха доживает до Фетира, принимает на себя удар от взлёта, навешав дебаф перед смертью
- далее не составляет труда уже Гнусом добить по стандартной тактике.
Может эта тактика сработала только для меня, но надеюсь кому-то поможет, потому что обычно Фетир убивал взлётом моего Гнуса.
0
Anonymous wrote on 2017-06-16 18:25:05
0
Химке wrote on 2017-04-25 10:50:23
0
GennPen wrote on 2017-03-07 14:18:44
- вам должно повезти чтобы противник не критовал
- вам должно повезти чтобы лягушка била по два раза языком
- вам должно повезти чтобы лягушка выжила в битве с первым противником
- вам должно повезти чтобы лягушка под ослеплением смогла накинуть рой мух
- вам должно повезти чтобы бабл илистого прыгуна прокнул на две мощные абилки второго противника
- вам должно повезти чтобы илистый прыгун дожил до третьего противника чтобы поймать взлет
Я думаю с быстрой лягушкой все было бы проще.
0
Lea wrote on 2017-03-08 02:59:30
Также в самом начале стратегии написано о том, что желательно, чтобы у вашей лягушки была скорость более 280. А если она не такая быстрая, то тут уже придётся начинать бой с начала, и не раз. Рада, что всё получилось всё же :)
0
GennPen wrote on 2017-03-08 04:55:06
0
Anonymous wrote on 2017-03-07 13:31:19
New Comment: